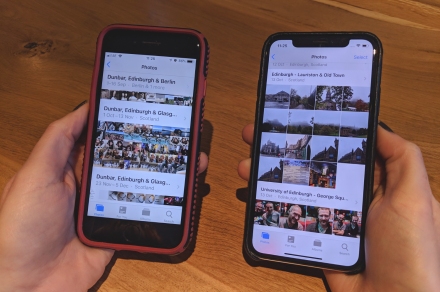
With the iPhone, you can share photos among friends, family, and colleagues with just a few taps — with no third-party software needed. However, sharing a handful of photos is very different from sharing a lot of photos at once, and you may be worried about doing so, say, if you’re transferring photos from an old iPhone to a new one (like an iPhone 14 or iPhone 14 Pro). Thankfully, though, it can be done, and it’s still quite easy to do.
In this guide, we’ll show you how to transfer photos from your iPhone to another iPhone, or from your old iPhone to your new one. The process is virtually identical from iOS 14 to the latest iOS 16, so it should cover pretty much every iPhone active today. It also works for sharing photos with a nearby iPad, if you want a nice big screen to view your snaps.
Transfer photos between iPhones via AirDrop
Apple’s AirDrop is an elegant and convenient way to send or receive photos from people nearby, and it’s super easy to use. Access the Control Center by swiping up from the bottom of the screen (for iPhones with TouchID, like the iPhone SE) or down from the right corner of your handset (for iPhone X or later).
Step 1: Enable Wi-Fi and Bluetooth on both phones and disable Personal hotspot. Select or tap and hold the Network card (upper left) in the Control Center until it expands, and then tap AirDrop control to enable it, if it is not already.
Step 2: Select Contacts only or Everyone.
Step 3: Launch the Photos app, select the desired photos, and tap the Share icon.
Step 4: You will see the AirDrop icon as one of several share options. Select it.
Step 5: The resulting pane shows the iPhones, other devices, or people nearby that have AirDrop enabled. Find that person’s phone or contact ID and choose it. A downloading pop-up screen appears.
Step 6: That person may be asked to accept or decline the download. Tap Accept, and the photo is added to their Photos app.
Transferring photos from an old iPhone to a new iPhone via iCloud
Say you have a new iPhone, and you want to transfer your current photo collection to the new handset. One way is to backup your iPhone, then restore your backup during setup of your new phone. There are several ways to accomplish this, but the easiest is with Apple’s iCloud.
Using iCloud to transfer your photos wirelessly is the most foolproof method. You only get 5GB of storage for free, so you might need to buy extra storage if you have a lot of photos. Keep in mind that if you have more than 5GB of photos on your phone, you might want to offload all that bulk anyway, unless you need them for professional reasons.
Step 1: Launch Settings and select your name at the top.
Step 2: Tap iCloud > Photos and make sure Sync this iPhone is toggled on.
Step 3: Log in with the same Apple ID on your new iPhone and repeat the process: Settings > [Your Name] > iCloud > Photos, and toggle on Sync this iPhone.
Step 4: Select Optimize iPhone storage or Download and keep originals. The first option saves on storage space.
Transferring photos via macOS’s Finder
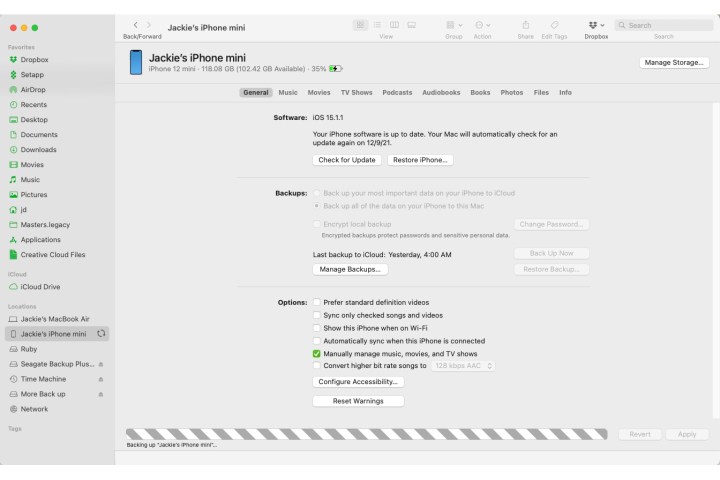
You can transfer all of your photos and other data with a simple backup restore. If you have a Mac with macOS Catalina or newer, all the way up to the latest macOS Ventura, you can share photos from your old phone to your Mac, then upload them to your phone via the Finder app on a Mac computer.
Step 1: Plug your old iPhone into your Mac or MacBook via its cable.
Step 2: Open the Finder by double-clicking the Hard drive icon, and select your device from the left-hand menu under Locations. You may be asked to trust your new device both on the Mac and on your new iPhone. You can trust both.
Step 3: Under Backups, choose Back up all of the data on your iPhone to this Mac and then choose Back up now.
Step 4: Once it’s finished, unplug the old iPhone and connect the new iPhone. Then choose Restore backup.
Transferring photos via iTunes
Apple eliminated iTunes in 2019 with macOS Catalina. If you’re using macOS 10.14 (Mojave) or older — or are on a Windows PC — you can use iTunes to transfer photos. Before you follow the steps below, make sure you have installed the most recent version of iTunes.
Step 1: Plug your old iPhone into your computer and launch iTunes.
Step 2: Select your iPhone in iTunes and click Summary in the left panel.
Step 3: Click on This computer under Backups in the right pane, then click Back up now.
Step 4: Turn on your new iPhone, and the iOS Setup Assistant will give you the option to Restore from iTunes backup.
Step 5: Connect your new phone to your computer and open iTunes.
Step 6: Select your new iPhone in iTunes and click Summary in the left pane, then click Restore iPhone in the right pane. Click Agree. Once the process ends, all your photos will be on your new iPhone.
Editors’ Recommendations
- 7 important tips to get your new Apple Watch ready for your wrist
- The 16 best Apple Watch faces you should be using
- How to fix an unresponsive iPhone touchscreen
- Snapchat Wrapped 2022: how to see your year in review Story
- I found a hidden end-of-2022 recap on my iPhone, but I wish I hadn’t


